
toastmaster air fryer manual
Toastmaster Air Fryer Manual: A Comprehensive Guide
This manual details safe operation, cleaning, and troubleshooting for Toastmaster air fryers, including gas fryer considerations and warranty details for optimal performance․
Toastmaster air fryers represent a modern approach to cooking, offering a healthier alternative to traditional deep frying․ These appliances utilize rapid air circulation technology to cook food with little to no oil, resulting in crispy textures and reduced fat content․ From digital models like the TM-904AF, offering precise control, to gas fryers like the TMFG series, Toastmaster provides diverse options․
Understanding the benefits and safety features outlined in this manual is crucial for maximizing your cooking experience․ Proper installation, especially for gas models, and diligent maintenance, including fat management, are key to longevity․ This guide ensures safe and efficient operation of your Toastmaster air fryer․
Understanding Your Toastmaster Air Fryer Model
Toastmaster offers a range of air fryer models, from compact digital units like the TM-904AF to larger capacity and gas-powered options such as the TMFG18 and TMFG30․ Each model features unique controls and functionalities․ Digital models boast preset programs and timer settings for convenience, while gas fryers require careful installation and restraint to prevent tipping․
Familiarize yourself with the specific components of your model, including baskets, racks, and control panels․ Understanding these features, alongside proper air supply considerations for gas units, will ensure optimal performance and safe operation․ Refer to the detailed parts identification section for a comprehensive overview․

Safety Precautions
Prioritize safety with clear instructions regarding electrical guidelines, preventing accidents, and understanding crucial safeguards when operating your Toastmaster air fryer․
Important Safety Instructions
Read all instructions before using your Toastmaster air fryer․ This appliance is designed for household use only․ To avoid potential hazards, never immerse the unit, cord, or plug in water or other liquids․ Always ensure the appliance is properly grounded․
Do not operate the air fryer with a damaged cord or plug, or after malfunction․ Supervise children closely when the appliance is in use․ Hot surfaces can cause burns; use oven mitts or handles․ Avoid operating the fryer near combustible materials․
This document provides important safeguard instructions for using electrical appliances․ Unplug from outlet when not in use and before cleaning․ Never leave the appliance unattended during operation․
Electrical Safety Guidelines
Ensure your outlet voltage matches the appliance’s rating to prevent damage or fire hazards․ Never use an extension cord unless absolutely necessary, and if so, select one rated for the appliance’s wattage․ Avoid running the power cord under rugs or near heat sources․
Regularly inspect the power cord for any signs of damage, such as cracks or fraying․ If damage is detected, discontinue use immediately and contact customer support․ This document provides important safeguard instructions for using electrical appliances;
Do not attempt to repair the appliance yourself; qualified personnel should handle all repairs․ Always unplug the air fryer before cleaning or performing any maintenance․ Grounding is essential for safety․
Preventing Air Fryer Accidents
Always operate the air fryer on a stable, heat-resistant surface, away from flammable materials․ Never leave the appliance unattended during operation․ Avoid overfilling the cooking basket, as this can cause food to spill and create a fire hazard․ Ensure the air fryer is properly vented, allowing for adequate air circulation․
Be cautious when removing the cooking basket, as it will be hot․ Use oven mitts or tongs to prevent burns․ Avoid splashing of hot liquid when installing or operating the fryer․ Keep children and pets away from the appliance during use․
Regularly clean the air fryer to prevent grease buildup, which can ignite;

Getting Started
Unbox your Toastmaster air fryer and identify all parts before initial use․ Proper setup and a first-time seasoning process ensure optimal cooking performance․
Unboxing and Initial Setup
Carefully remove your new Toastmaster Air Fryer from its packaging, ensuring all packing materials are removed․ Verify all components are present, referencing the parts list within this manual․ Place the air fryer on a stable, heat-resistant surface with adequate ventilation around all sides․ Before first use, wipe down the interior and exterior with a damp cloth to remove any dust or residue from the manufacturing process․ Avoid immersing the unit in water․ Ensure the power cord is undamaged and properly grounded․ Familiarize yourself with the control panel and basket locking mechanism․ A proper initial setup guarantees safe and efficient operation, maximizing your cooking experience with your new appliance․
Parts Identification
Your Toastmaster Air Fryer consists of several key components․ These include the main housing unit, the removable cooking basket, and often, a crisper plate or rack designed to elevate food for even cooking․ Identify the control panel, featuring power and function buttons, as well as temperature and timer settings․ Locate the air intake and exhaust vents – do not obstruct these․ Some models include additional accessories like skewers or baking pans․ Familiarize yourself with the basket locking mechanism to ensure secure operation․ Understanding each part’s function is crucial for safe assembly, operation, and proper maintenance of your air fryer․
First-Time Use: Seasoning the Air Fryer
Before your first cooking adventure, season your Toastmaster Air Fryer․ This process helps protect the non-stick coating and ensures optimal performance․ Lightly coat the basket and crisper plate with a high smoke point oil, like vegetable or canola oil․ Run the air fryer empty at 400°F (200°C) for 10-15 minutes․ This initial heating cycle polymerizes the oil, creating a protective layer․ A slight odor is normal during this process – ensure adequate ventilation․ Repeat if necessary․ Seasoning extends the life of your air fryer and prevents food from sticking, guaranteeing delicious results every time․
Operating Instructions
Proper operation involves powering on, setting temperature and time, and preheating․ These steps ensure efficient and safe cooking with your Toastmaster air fryer․
Powering On and Basic Controls
To begin, ensure the air fryer is properly plugged into a grounded electrical outlet․ Most Toastmaster models feature a simple power button to initiate operation․ Digital models, like the TM-904AF, utilize a control panel for precise adjustments․ Familiarize yourself with the power indicator light, which confirms the unit is receiving electricity․
Basic controls typically include buttons or a dial to adjust cooking time and temperature․ Some models offer preset programs for common foods, simplifying the cooking process․ Always refer to the specific instructions for your model, as control layouts may vary․ Understanding these fundamental controls is crucial for safe and effective air frying․
Temperature and Time Settings
Toastmaster air fryers offer adjustable temperature and time settings for versatile cooking․ Temperature is typically controlled between 200°F and 400°F (93°C ⎯ 204°C), though specific ranges vary by model․ Cooking time can usually be set up to 60 minutes, with some models offering extended timers․
Refer to recommended cooking charts for optimal settings based on the food type․ Preheating is often advised for best results, typically around 3-5 minutes at the desired temperature․ Digital models provide precise control, while analog models use dials․ Accurate settings are vital for achieving perfectly cooked, crispy food while ensuring safety․
Preheating the Air Fryer
Preheating your Toastmaster air fryer is crucial for achieving optimal cooking results and ensuring even crisping․ Most recipes benefit from a preheated unit, typically around 3 to 5 minutes at the desired cooking temperature․ This process ensures the heating element reaches its peak performance before food is introduced․
Preheating helps to create a consistent cooking environment, leading to faster cooking times and a more desirable texture․ Some advanced models feature a preheat function, while others require manual setting․ Always consult your recipe or the recommended cooking chart for specific preheating instructions․
Cooking with Your Toastmaster Air Fryer
Explore diverse recipes utilizing recommended times and temperatures, alongside proper accessory usage, to unlock the full potential of your Toastmaster air fryer․
Recommended Cooking Times & Temperatures
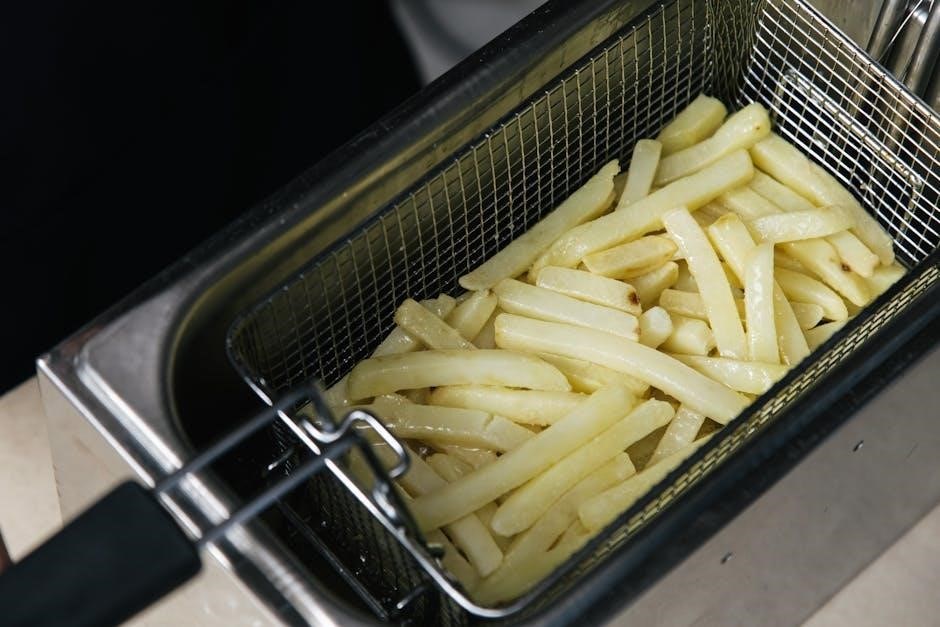
Achieving perfectly cooked meals with your Toastmaster air fryer relies on understanding optimal cooking parameters․ While specific times vary based on the model and food type, general guidelines ensure delicious results․ For French fries, 400°F (200°C) for 15-20 minutes, shaking halfway through, delivers crispy perfection․ Chicken pieces typically require 375°F (190°C) for 20-25 minutes․
Vegetables benefit from 390°F (200°C) for 10-15 minutes․ Always consult specific recipes for precise instructions․ Remember, these are starting points; adjust based on your preference and the quantity of food․ Regularly checking for doneness is crucial․ Proper temperature control is vital for both safety and flavor, preventing undercooked or burnt dishes․ Experimentation will help you master your air fryer!
Cooking Different Types of Food
Your Toastmaster air fryer excels at preparing a diverse range of foods, from crispy snacks to complete meals․ For best results, consider food-specific techniques․ Delicate items like fish benefit from lower temperatures (360°F/180°C) and shorter cooking times to prevent drying․ Meats, especially poultry, require thorough cooking at higher temperatures (375°F/190°C) to ensure safety․
Vegetables roast beautifully with a light coating of oil and seasoning․ Frozen foods often require no pre-thawing, but may need slightly extended cooking times․ Utilizing accessories like racks and baskets optimizes airflow for even cooking․ Remember to avoid overcrowding the basket for consistently crispy outcomes․ Experiment and enjoy!
Using Accessories (Baskets, Racks, etc․)
Toastmaster air fryers often include accessories to expand cooking versatility․ Baskets are ideal for smaller items like fries or chicken nuggets, ensuring even crisping through maximized airflow․ Racks elevate food, allowing for layered cooking – perfect for roasting vegetables alongside a protein․ Skewers facilitate kebab-style cooking, while baking pans enable cake or bread preparation․
Proper accessory placement is crucial; avoid overcrowding to maintain optimal circulation․ Always ensure accessories are securely positioned before operation․ Cleaning accessories immediately after use prevents food buildup and extends their lifespan․ Refer to your model’s specific guide for compatible accessories and recommended usage․

Cleaning and Maintenance
Regular cleaning ensures optimal performance and longevity․ Daily procedures involve wiping down surfaces, while deep cleaning requires removing and washing components thoroughly․
Daily Cleaning Procedures
To maintain peak performance, daily cleaning is essential after each use․ Always unplug the air fryer and allow it to cool completely before beginning․ Remove the basket and any accessories, washing them with warm, soapy water․ Ensure all food residue is removed; stubborn bits may require soaking․ Wipe down the interior and exterior surfaces with a damp cloth․
Pay close attention to the heating element, gently removing any splatters․ Avoid abrasive cleaners, as they can damage the non-stick coating․ Thoroughly dry all parts before reassembling․ Keeping the air fryer clean prevents fat deterioration and ensures consistent cooking results, extending the appliance’s lifespan․ Regular maintenance is key!
Deep Cleaning Your Air Fryer
For a thorough clean, perform a deep clean monthly, or more frequently with heavy use․ After unplugging and cooling, disassemble all removable parts․ Wash the basket, racks, and pan with hot, soapy water, potentially using a degreasing agent for stubborn grease․ Inspect the interior for built-up residue and carefully clean with a non-abrasive sponge and mild detergent․
Pay attention to the heating element, ensuring it’s free of debris․ Rinse all parts thoroughly and allow them to air dry completely before reassembly․ This prevents fat deterioration and maintains optimal cooking performance․ A clean fryer ensures food tastes its best!
Fat Deterioration and Maintenance (Based on Deep Fat Fryer Info)
Although an air fryer uses significantly less fat, understanding deterioration principles is helpful․ Air, moisture, salt, and food particles break down frying mediums over time․ To slow this process, maintain proper cooking temperatures and regularly drain any accumulated fat from the kettle or drip tray․ Filtering or straining the fat – even in an air fryer context – daily removes particles․
Choosing a stable fat is key, and keeping all components clean prevents build-up․ Consistent cleaning extends the life of your air fryer and ensures optimal cooking results, mirroring best practices from traditional deep fat fryers․

Troubleshooting
This section provides solutions for common issues, explains error codes, and details steps to take if your Toastmaster air fryer malfunctions unexpectedly․
Common Issues and Solutions
Food isn’t crispy: Ensure the basket isn’t overcrowded, and flip food halfway through cooking․ Adjust cooking time and temperature as needed for optimal results․
Air fryer isn’t heating: Verify the power cord is securely plugged in and the outlet is functioning․ Check if the timer is set correctly, and the unit isn’t in a paused state․
Error codes displayed: Refer to the “Error Codes and What They Mean” section for specific troubleshooting steps related to the displayed code․ Resetting the unit might resolve some errors․
Unusual smells: Initial use may produce a slight odor; this is normal․ Persistent smells could indicate food residue needing cleaning․ Ensure proper ventilation during operation․
Smoke during cooking: High-fat foods can generate smoke․ Reduce cooking temperature or use a lower fat content․ Regularly clean the basket and drip tray to prevent fat buildup․
Error Codes and What They Mean
E1: Temperature Sensor Error – Indicates a malfunction with the internal temperature sensor․ Disconnect and reconnect the air fryer; if the error persists, contact customer support․
E2: Heating Element Failure – Suggests a problem with the heating element․ Do not attempt to repair yourself; professional service is required․ Discontinue use immediately․
E3: Overheat Protection – The unit has automatically shut off due to excessive temperature․ Allow it to cool completely before restarting․ Ensure adequate ventilation․
E4: Basket Misplaced – The basket isn’t properly inserted or secured․ Remove and reinsert the basket firmly, ensuring it clicks into place․
E5: Timer Malfunction – The timer isn’t functioning correctly․ Reset the timer and restart the cooking process․ If the issue continues, seek assistance․
What to Do If Your Air Fryer Malfunctions
First, disconnect the air fryer from the power outlet and allow it to cool completely․ Inspect the power cord for damage; never operate with a frayed cord․ If the issue isn’t a simple fix like incorrect basket placement, avoid attempting self-repair, especially concerning heating elements․
Consult the error code section of this manual to identify the problem․ If the malfunction persists, or if you observe smoke or unusual smells, immediately contact Toastmaster customer support․
Do not immerse the air fryer in water or any other liquid․ Attempting repairs yourself may void the warranty and pose a safety hazard․

Advanced Features (If Applicable)
Digital models offer preset programs and timer functions for convenient cooking․ Auto-shutoff enhances safety, providing peace of mind during operation and usage․
Digital Control Panel Functions
The digital control panel on select Toastmaster air fryer models streamlines operation․ It features intuitive buttons for power, temperature adjustment, and precise time setting․ Users can easily navigate through preset cooking programs designed for popular foods like fries, chicken, and vegetables․ The display clearly shows the selected temperature and remaining cooking time, offering real-time monitoring․
Furthermore, the panel often includes a start/pause button for mid-cycle adjustments and a timer function allowing for delayed cooking․ Some models boast a keep-warm feature, maintaining food temperature after cooking completes․ Understanding these functions ensures optimal performance and unlocks the full potential of your Toastmaster air fryer․
Preset Cooking Programs
Toastmaster air fryers with digital controls often include convenient preset cooking programs․ These programs automatically set the optimal temperature and time for frequently cooked items, simplifying meal preparation․ Common presets include options for French fries, frozen snacks, chicken wings, steak, and even baked goods․ Utilizing these presets ensures consistently delicious results with minimal effort․
However, remember that these are starting points․ Adjustments may be necessary based on food quantity and desired crispness․ Experimenting with slight modifications to the preset settings allows for personalized cooking experiences․ Refer to the recommended cooking times and temperatures section for further guidance and customization options․
Timer and Auto-Shutoff Features
Toastmaster digital air fryers are equipped with a built-in timer for precise cooking control․ This feature allows you to set the desired cooking duration, ensuring your food is cooked to perfection without constant monitoring․ The timer typically ranges up to 60 minutes, accommodating a wide variety of recipes․
Crucially, most models also include an auto-shutoff function․ This safety mechanism automatically turns off the air fryer when the timer reaches zero, preventing overcooking and potential hazards․ The auto-shutoff provides peace of mind, especially when multitasking or leaving the appliance unattended․ Always verify the auto-shutoff is functioning correctly․

Gas Fryer Considerations (Related to TMFG Models)
TMFG gas fryers require secure installation, adequate ventilation, and clearance from combustibles to prevent tipping and ensure safe operation with hot liquids․
Installation and Restraint
Proper installation is crucial for safe operation of Toastmaster TMFG gas fryers․ The fryer must be restrained to prevent accidental tipping, especially when installed, as this could lead to splashing of hot liquids and potential burns․ Utilize adequate ties or anchoring methods during installation to secure the unit firmly․
Ensure the installation location meets all local codes and regulations regarding gas appliance installation․ Avoid placing the fryer near flammable materials․ Remember, a stable and secure installation minimizes risks and maximizes the longevity of your Toastmaster gas fryer․ Prioritize safety during every step of the process․
Adequate Air Supply
Toastmaster TMFG gas fryers require provisions for an adequate air supply to ensure efficient and safe combustion․ Insufficient ventilation can lead to incomplete combustion, producing carbon monoxide – a dangerous, odorless gas․ Ensure the installation area has ample airflow, complying with local gas appliance ventilation codes․
Do not obstruct the fryer’s ventilation openings․ Maintaining proper airflow is vital for optimal performance and safety․ Regularly inspect the ventilation pathways for any blockages․ Prioritize a well-ventilated space to safeguard against potential hazards and ensure the longevity of your Toastmaster gas fryer․
Combustible Materials and Clearance
Maintaining safe clearances around your Toastmaster TMFG gas fryer is paramount to prevent fire hazards․ Keep the appliance area clear and free from all combustible materials, including paper, wood, fabrics, and flammable liquids․ A minimum clearance distance, as specified in local codes, must be observed on all sides and above the fryer․
Never operate the fryer in a confined space where combustible materials are present․ Regularly inspect the surrounding area for potential hazards․ Proper clearance ensures safe operation and minimizes the risk of accidental ignition, protecting both property and personnel․

Warranty Information
Toastmaster provides a warranty covering defects in materials and workmanship․ Contact customer support for specific details, claim procedures, and warranty duration information․
Toastmaster Air Fryer Warranty Details
Toastmaster air fryers are warranted against defects in materials and workmanship for a specified period from the date of original purchase․ This warranty covers parts and labor necessary to repair or replace the appliance if it proves defective under normal household use․ The warranty period varies by model, so please retain your proof of purchase․
Damage resulting from misuse, abuse, accidents, alterations, or lack of proper maintenance is not covered․ This warranty does not apply to cosmetic damage or normal wear and tear․ To obtain warranty service, contact Toastmaster customer support with your model number and proof of purchase․
Contacting Customer Support
For assistance with your Toastmaster air fryer, or to initiate a warranty claim, our dedicated customer support team is readily available․ You can reach us through several convenient channels, including a toll-free telephone number and a dedicated email address․ Please have your model number and proof of purchase readily available when contacting support to expedite the process․
Our website also features a comprehensive FAQ section and troubleshooting guides to address common issues․ We strive to provide prompt and helpful assistance to ensure your complete satisfaction with your Toastmaster appliance․ Visit our website or call for detailed contact information․